Tuesday, December 1, 2009

Mustard Sauce

Today I wanted to enjoy some of the leftover ham (Swiss "Nussschinkli"). Since there was some sauce missing when we tried the ham the first time, I decided to prepare/create a mustard sauce that would work nicely with the ham. It actually turned out pretty well and tasty for my first try. Here is the recipe:

Marc's Mustard Sauce (Marc's Senfsauce)

Ingredients:
  • 1 Tbls butter
  • 1 Tbls flour
  • 2 dl vegetable stock
  • 2 dl low fat milk (1.5% fat)
  • 1 Tbls mild mustard
  • 1 Tbls fresh citrus juice
  • 1 tsp sugar
  • 0.5 tsp sea salt
  • 1 tsp ground black pepper
  • 1 tsp dill
Preparation:
  • slowly melt the butter in a small pan using medium heat
  • add the flour to the melted butter and stir it with a whisk
  • let it cook on medium heat until the mixture starts to build "foam"
  • add the vegetable stock in small portions to the pan, always stirring the contents with the whisk (this helps to avoid having clumps in the sauce)
  • add the milk in small portions while stirring with the whisk
  • add the citrus juice and mustard, whisk the mixture well
  • increase the heat to 3/4 of maximum and wait until it starts to cook slightly
  • add the pepper, salt, sugar and dill, gently whisk the mixture
  • keep it cooking for another 5-10 minutes at medium heat while whisking it gently from time to time
  • let the pan cool down aside for a while (10-15 minutes) before serving the sauce (this makes the sauce become a bit thicker)

Sunday, November 22, 2009

Problems starting or charging the iPhone

I now already had two times the problem that the completely drained battery of my iPhone did not want to charge anymore. The only thing I see, is the empty battery symbol. But, this does not change, even after having it plugged in for many hours. Also there is no way to start the iPhone.

Fortunately, I found a solution somewhere in the Internet and thought I might also share the trick to revive iPhone charging again:

  1. Plug the iPhone to a power source (PC via USB or charger), let it there for 15 minutes and do not worry if there is no indication that the battery is charging.
  2. Put the side switch of the iPhone to silent mode (the red dot should show).
  3. Unplug the iPhone form the power source and make sure it is turned off.
  4. Toggle the side switch of the iPhone four times (normal - silent - normal - silent).
  5. Press the home and power button (the one on top of the iPhone) simultaneously until the Apple logo appears (should take about 10 seconds).
  6. Plug the iPhone to a power source and let it fully charge, you can now use again your iPhone.

Thursday, October 8, 2009

Fix wrong / different emails showing in Apple's Mail list and detail view

I already had a few times the problem that emails in Apple's Mail application got messed up. This means that when you select an email in the "list" view, the email that is then shown in the detail view does not correspond to the selected list entry. Also double-clicking the email in the list view opens the wrong email, which has nothing to do with the information shown in the list view about that email (sender, subject, etc).

To fix this, you only need to rebuild Apple Mail's database. Select the mail account / folder in the mailbox list on the left. Then go to the menu "Mailbox" and select "Rebuild". This rebuild might take a while, but then the email list to email detail links will work again correctly.

I guess Mail gets mainly messed up with its indexes because of Mail.app crashes.

Saturday, July 11, 2009

Lock your Mac with a hot key

LockTight is a little handy tool that helps you quickly lock the screen of your Mac with a touch of a hotkey combination.

Via tuaw

Thursday, June 18, 2009

Count words in a PDF file on Mac OS X

To count the amount of words in a PDF file on Mac OS X, just open the Terminal.app and type: ps2ascii myfile.pdf | wc -w, where myfile.pdf is the name of the PDF, of which you want to count the words. Of course you can also use all the other options of the wc command (such as counting characters, etc.).

Via macosxhints (second comment by kalderon).

Tuesday, June 16, 2009

See processes accessing your HD using iotop

When your HD seems to be busy and you don't know why, have a look at the command iotop, which can be used in the terminal. This works fine on Linux and also Mac OS X. You might need to start it as root (sudo iotop), and also it might not be installed by default on your Linux, so you can e.g. install it using sudo apt-get install iotop (for Ubuntu / Eeebuntu / Debian).

Via Lifehacker.

Monday, June 15, 2009

Ubuntu Notify for Thunderbird

Also Thunderbird can use the new notification system of Ubuntu 9.04 (which is also available in Eeebuntu 3.0), just install the Thunderbird add-on "Ubuntu Notify" and you will see notifications when new emails arrive.

If you want to have download complete notifications for Firefox, have a look at my previous post regarding the FirefoxNotify add-on .

Tuesday, June 9, 2009

OSX86 10.5.7 Update Guide by Max

Max posted a very nice guide to update from OSX86 10.5.6 to 10.5.7. I will try the update within the next few days and then write down how it went. Thanks again to Max for the great guide.

Tuesday, June 2, 2009

Eeebuntu 3.0 Standard and NBR editions availaible for download

http://forum.eeebuntu.org/ The Standard and NBR editions of Eeebuntu 3.0 are now available on the official download page.

I have installed the Base version already 2 weeks ago and I am very happy with it.

Check also their forums if you have any problems installing or running Eebuntu 3.0.

Saturday, May 30, 2009

Download complete notifications with FirefoxNotify for Eeebuntu 3

FirefoxNotify works fine with Eeebuntu 3 and also Ubuntu 9.04. Just install the plugin and you will get "Download Complete" notifications in the same style as you get the notifications for device enabling/disabling, volume up/down/mute, etc.

Monday, May 25, 2009

Improving performance for Eeebuntu 3.0

There are several ways to improve the performance for EEEPCs with Eeebuntu 3.0:

You can give the sound card a dedicated interrupt by editing /etc/modprobe.d/alsa-base.conf and adding the following line: options snd_hda_intel enable_msi=1 (source from Eeebuntu forums).

You can also accelerate the boot time by letting the kernel do some optimizations for the boot process as described in the corresponding Fastboot entry in the Eeebuntuwiki.

If you have any other suggestion on ho to improve the performance n Eeebuntu for EEEPCs, please post a comment.

Fix error message stating that Xorg is not configured correctly on Eeebuntu 3.0

Whenever I started my EEEPC 1000H with Eeebuntu 3.0, I got an error on the top right corner saying something about a touchpad problem related to my xorg.conf.

The answer to fix this problem can be fount at the corresponding Xorg entry in the Eeebuntuwiki.

Just copy & paste the provided text to your xorg.conf and all should be fine. It work at least for me without any problems.

Sunday, May 24, 2009

How to mount fat32 partition in Linux as read & write for everyone

On my EEEPC 1000H I wanted to have a shared partition being able to use it from Windows 7 and Eeebuntu.

Edit your /etc/fstab as follows (change /dev/sdaX to your shared partition location):
/dev/sdaX /mnt/shared vfat defaults,user,auto,umask=0 0 0

Now it should automatically mount the partition and it should be readable and writable by all users. If you want to disable auto-mount of the partition, replace auto with noauto.

Thursday, May 14, 2009

Hibernate fix in Eeebuntu after swap resize

I just got myself a nice ASUS EEEPC 1000H and directly installed Eeebuntu on it.

Hibernate was never working for me out of the box after installation, so I resized the swap space, because I thought it might be too small (which actually broke even more).

Here are the steps I used to finally enable Hibernation:
  • launch  gnome config sudo gconf-editor and navigate to "apps -> gnome-power-manager -> general" and make a mark at "can_hibernate"
  • in the terminal enter blkid and copy the UUID of the swap partition
  • edit the filesystem table using "sudo gedit /etc/fstab" and add previously copied UUID of the swap space to the line to mount the swap partition: UUID=xxxx none swap sw 0 0 (where xxxx is the copied UUID)
  • edit the initramfs settings for resuming using "sudo gedit /etc/initramfs-tools/conf.d/resume" and add the previously copied UUID: RESUME=UUID=xxxx (where xxxx is the copied UUID)
  • enable the new initramfs settings by typing sudo update-initramfs -u
This might also work for other netbooks and also other linux distributions.

Can't wait to try out the new eeebuntu 3, which should be available tomorrow.

Thursday, February 19, 2009

How to update OSX86 from 10.5.5 to 10.5.6

This guide assumes that you have an OSX86 version 10.5.5 running without any problems (sound, net, etc.) on your system (I had a Kalyway 10.5.2 installation and updated it step by step to 10.5.5 before I applied the 10.5.6 update). Since in this guide we are going to change the kernel anyway, it does not matter which kernel you use at the moment. I have an ASUS P5K-VM motherboard, but I guess it might also work with some other motherboards having a more or less identical components configuration (feedback about that is very welcome). It is always advisable to backup your complete system first (e.g. using Time Machine), so you can restore the previously working configuration in case something goes wrong.

1) Pre-Install requirements
  • Install Bootloader including PC-EFI9 with Chameleon 1.0.12 integrated (download here)
  • Install newest XNU 9.5.0 kernel (download here)
  • Install Universal Installer "UInstaller" (download here)
  • Install OSX86Tools (download here)
  • Backup all your 10.5.5 extensions using OSXTools86 by clicking "Backup extensions" (e.g. back them up to ~/old-10.5.5-kexts)

2) Updating to 10.5.6 (info from here)
  • Open Terminal.app and type
    • ”sudo –s”
    • *type password*
    • ”while sleep 1;”
    • ”do rm –rf /System/Library/Extensions/AppleIntelCPUPowerManagement.kext;done”
  • Open 10.5.6 Update Installer (download  10.5.6 Update here)
  • Run update BUT DO NOT RESTART!
  • Go back to your terminal and press Control-C to end the script
  • In Terminal.app type:
    • ”nano /System/InstallAtStartup/scripts/1” and replace the line Dont Steal Mac OS X.kext with dsmos.kext if any exists (exit using "CTRL-X" and save by pressing the "Y" key)
  • Open OSX86Tools and check "Repair permissions" & "Set Extensions permissions" & "Clear Extensions Cache"
  • Restart

3) Apply various fixes
  • Fix Time-Machine with UInstaller (select "Apply Ethernet EFI String (Time Machine Fix)")
  • Fix startup resolution with UInstaller ("Set Native Boot Resolution to: " with your appropriate values)
  • Install some fixing kexts using UInstaller ("Apply kext package")
  • Fix unknown or wrong processor string in "About this Mac": edit the file /System/Library/CoreServices/Resources/English.lproj/AppleSystemInfo.string and replace '"UnknownCPUKind" = "Unknown";' with your choice (e.g. "UnknownCPUKind" = "Intel Core2Quad Q6700 2.66 GHz";), make sure not to use any special characters!
  • Remove (if exists) ALCinject.kext from /System/Libarary/Extension
  • Create a temporary kext install folder (e.g. a subdirectory in your home folder called install-extensions)
  • Copy from the backup 10.5.5 extensions folder (e.g. ~/old-10.5.5-kexts/Extensions) the file seatbelt.kext to the temporary kext install folder (e.g. ~/install-extensions):
  • Download and unpack patched AppleHDA.kext (download here) for ALC883 (might also work with others), then copy it to the temporary kext install folder (e.g. ~/install-extensions), more patched ALC88X drivers from Taruga are available here
  • Download and unpack HDAEnabler.kext (download here), then copy it to the temporary kext install folder (e.g. ~/install-extensions)
  • Download and unpack the AHCI fix for 10.5.6 (download here), then copy the two kext files (AppleAHCIPort.kext and IOAHCIFamily.kext) to the temporary kext install folder (e.g. ~/install-extensions)
  • Download and unpack sleep fix for 10.5.6 (download here), then copy only the file EHCISleepEnabler.kext to the temporary kext install folder (e.g. ~/install-extensions)
  • Download and unpack fixes for USB (download here), then copy both files (IOUSBFamily.kext and IOUSBMassStorageClass.kext) to the temporary kext install folder (e.g. ~/install-extensions)
  • Install all the kernel extensions from the temporary kext install folder (e.g. ~/install-extensions) using OSX86Tools (button "Install Kexts")
  • Restart
  • Open OSX86Tools and check "Repair permissions" & "Set Extensions permissions" & "Clear Extensions Cache"
  • Restart

Various sources I used to compile this guide, apologies if I left someone out, if so, please tell me and I will add the missing ones:
UPDATES:
  • 2009-02-20: changed link to point to new AppleHDA.kext and added link to forum post about Taruga's ALC88X kexts with corresponding link to the kexts
  • 2009-02-24: changed link to point to new AHCIFix.zip

Tuesday, February 17, 2009

WD Desktop Elements Mac Icons

Since I just bought two 1 TB WD Desktop Elements hard drives for my Mac, I also searched for some nice icons that would go nicely with the Leopard theme. Unfortunately I only found icons for the WD MyBook series. With some inspiration, Adobe Photoshop CS3 and img2icns I managed to produce a set of black shadowless WD Desktop Elements icons for the Mac. Enjoy! If someone requires the same thing for the "white" version of the hard drive, please let me know in the comments.

Download the black shadowless WD Desktop Elements icons.

Wednesday, January 28, 2009

1000px: Basel main station

Main station in Basel at evening time, taken with my new Panasonic DMC-TZ5

From 1000px

Downloadable Manual for the Panasonic DMC TZ5

The manual for the Panasonic DMC TZ5 can be downloaded here (it's a joint manual for the TZ4 and TZ5, the name of the PDF only has the TZ4 in the name though).

Jasper's DRIMaker

If you like HDR (high dynamic range) photos, you might want to take a closer look at Jasper's DRI maker. It's donationware, so you can do try before "buy". Since my new compact cam (Panasonic DMC TZ5) also support exposure bracketing, this might be a nice tool to tryout.

Tuesday, January 27, 2009

Tags for Mac OS X

People nowadays are very fond of tags. These tags are e.g. used for Flickr, social bookmarking sites such as del.icio.us and many more. Now there is an application that brings tagging to your desktop in Mac OS X, it is simply called Tags. It seems that tags work with all the major applications for Mac OS X, such as Office, iPhoto, iWork, and many more (see full list of supported apps here). You can then search for the previously applied tags using Mac OS X integrated Spotlight search. Even Apple's Mail application is supported (where I would use it most), but unfortunately the tags for Mail are only stored locally at the moment without the support for IMAP. So, syncing the tags for Mail between different machines does not work yet. They promise though that they work on adding the IMAP support for Tags via Mail. When this would be added as well, I might consider giving it a try, but for now this missing feature is a show stopper for me (at least for the moment).

iPhoto to JAlbum Exporter

In case you want to extract automatically and easily all photo albums from iPhoto, you can do this using the iPhoto to JAlbum export tool, which allows exporting each album to a seperate folder. Not tested yet.

Monday, January 26, 2009

Hashtags in Twitter

I just noticed, that lots of people use hashtags (e.g. #photography) in their twitter posts.

A good introduction to hashtags can be found at Twitter Fan WiKi. More background info on hashtags can also be found at FactoryCity .

Basically you need to follow the twitter user "hashtags" (they will then follow you back to get your hashtags in your tweets indexed). Then your tweets with hashtags should appear at hashtags.org.

Skimming trough the above mentioned web pages, I found some basic rules that one should follow when using hashtags:
  • focus on your update first and add hashtags only if they add value to the tweet
  • find out if the subject you're tweeting already has an established hashtag 
  • append no more than one to three hashtags
  • rather append or prepend the hashtags to a tweet than using the hashtagged words in sentences

Geforce 9600GT on OSX86

A few weeks ago, I installed Geforce 9600GT (ASUS silent version) in a friend's OSX86 machine.

For this issue, the following three forum posts at InsanelyMac were very helpful:
I downloaded the driver (NVIDIA 9 Series Driver Installer v2) from the first mentioned forum post. Then I modified the info.plist of in the NVDANV50Hal.kext (after I installed the driver from the first forum post!) as described in the second mentioned forum post, but I'm not sure this would be really necessary. I also had to use the OSX86Studio to modify the GFX string as shown in the third mentioned forum post (see also the picture with the settings here). 

Sunday, January 25, 2009

Reimport and reuse AVCHD video clips for existing iMovie projects

When you delete the source video files (of a previously imported AVCHD video) in "iMovie Events", existing iMovie projects referring to those source files become unusable for further re-encoding / processing. But don't worry, keep the project files (even delete the media browser shared files for it). You can reactivate the project later again if you still have the original AVCHD source files (with the full folder structure as on the memory card). You can later import again the original AVCHD files (that get converted again newly to AIC). Make sure that the event name is the same as before. then it should work out of the box. If you do not remember the name of the event folder used in the project, you can see all the clips used in the project by opening the package contents of the project and opening the file called "Project" with the "Property List Editor" (need to install the Developer Tools to have that), it is a binary plist, which contains all the full path names to the clips (including the name of the event sub-folder).

To make it easier in the future, use the same name for your archive (e.g. on DVD or as DMG) as for the event name in iMovie.

This whole thing is especially handy because the AVCH source files are taking around ten times less space than after they are imported and converted to AIC (Apple Intermediate Codec). No need to buy all the time new hard drives when you want to keep all the projects in iMovie editable, but the events keep up using up the hard drive space so quickly for imported AVCHD footage.

Also remember that in order to be able to import the video again to iMovie, you need to have the full folder structure as on the memory card or hard drive, therefore back the hard drive or memory card to a DMG or DVD / Blue Ray drive with the complete folder structure.

This tip might even work with DV files, imported from DV Camcorders, but I haven't tested it yet.

Wednesday, January 21, 2009

Fedora 10 on a Lenovo T400

My work Laptop had a problem with Fedora 10, I was not able to start the X graphical environment. After a quick Google search I found the solution at Adobro Online.

Basically, the X-server gets confused because of the two graphic cards in the Laptop. Just disable the "Switchable Graphics" option in the BIOS ("Display" section) and select e.g. the "discrete" graphics as default and you are good to go. It though seems that the ATI graphics driver does not yet support graphic acceleration features, so you might want to switch to the "integrated" graphics card if you need the extra acceleration.

Wednesday, January 14, 2009

Re-encoding unplayable (in Quicktime) ASF files

I recently got some ASF files that were not able to be played (only audio, no video) in Quicktime using the Flip4Mac WMV plugin. The files though played fine in VLC, but I prefer to watch them using Frontrow.

The ASF files can be re-encoded using VLC:

  1. Use the "Streaming/Exporting Wizard..." from the "File" in VLC
  2. Select "Transcode/Save to file" and click "Next"
  3. Select the file you want to re-encode using "Choose..." or an existing playlist item
  4. Enable "Transcode video" with "WMV 2" as "Codec" and e.g. "1024" as "Bitrate (kb/s)", also
  5. enable "Transcode audio" with "MP3" as "Codec" and e.g. "128" as "Bitrate (kb/s)", then click "Next"
  6. Select "ASF" as "Encapsulation format" and click "Next"
  7. Click "Choose", enter you preferred destination file name and directory, then click "Next"
  8. In the "Summary" click "Finish" and wait until the progress bar in the controller window moved to the right side
  9. Enjoy the re-encoded ASF in Quicktime

Tuesday, January 13, 2009

EPS QuickLook Plugin for Mac OS X Leopard 10.5

Since I often use Encapsulated Postcript files, I find the EPSQuickLookPlugIn quite handy.

Monday, January 12, 2009

Core Image benchmark comparison (Geforce 7600GT, Geforce 9600GT and Radeon 3850)

I use my Macs and OSX86 machines also for photo editing with Aperture. The Apple Pro-Apps (Aperture, Finalcut, etc.) rely on Core Image and therefore profit heavily from a fast graphics card in the system.

To compare different models of systems and graphics cards, I made some comparison benchmarking tests using iMaginator 4 (trial version).

The test consists of exporting a morphing movie of 1000 frames, which contains all transition effects in the order they are listed in the selection pane (see below) using the two default images (leopard and rose) as source and destination for the morphing.

These were the "Transisions" used (top to down):

And I changed the following preferences (only changed # Frames to 1000):


Then I saved the movie using "Save to Movie" from the "File" menu, started the stop watch when I clicked the "Save" button, moved the mouse, so the cursor went to the "Beachball". Then I waited until the cursor turned back to the normal pointer and stopped the stop watch.

These were the results on Mac OS 10.5.5 (faster = better):

iMac G5 2.0 GHz ATI X800: 6m50s
iMac C2D 2.33 GHz Geforce 7600 GT: 2m14s
OSX86 C2Q 2.66 GHz ATI Radeon 3850: 1m22s
OSX86 C2Q 2.83 GHz Geforce 9600GT: 1m21s

I was surpised to see the Geforce 9600GT perform that fast, although that configuration is slightly faster and has more cache for the CPU than the one with the Radeon 3850. But I guess it is safe to say that the Geforce 9600GT is not such a bad choice for Core Image intensive apps. I think a Radeon 3870 would probably out-perform the Geforce 9600GT. Maybe a Geforce 9800GT could be faster than a Radeon 3870, but unfortunately I can't test that since I do not have these graphics cards at hand.

In a later post I might add more details about the system configurations and maybe will also put some tests done regarding OpenGL performance of the same systems (where the Geforce 9600GT also scored  better than the ATI Radeon 3850).

Make extended print dialog in Mac OS X show by default

In Terminal.app enter the following line:

defaults write -g PMPrintingExpandedStateForPrint -bool TRUE

to undo, replace TRUE with FALSE

via tuaw.com

Sunday, January 11, 2009

Possible Sigma lenses for my Nikon D80

I have been looking at some possible Sigma lenses, which would nicely fit to my Nikon D80. So far I only use super zooms from Nikon (18-200mm VR and 70-300mm VR), which unfortunately have not very low starting aperture. I also use a fix 50mm f/1.8 lens from Nikon.

The following Sigma lenses caught my eye:

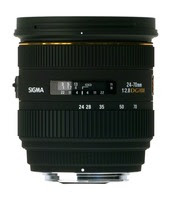
Sigma 24-70mm, f/2.8 EX DG Asp. Makro, Nikon
at Digitec for CHF 550.--


or the newer "updated" Sigma 24-70mm, f/2.8 EX DG HSM, Nikon
at fotovideoplus.ch for CHF 659.-- (not yet avail.)


Sigma 70-200mm, f/2.8 APO EX DG HSM II, Nikon
at Digitec for CHF 947.--


What I like about the Sigma lenses is that they are about one-third to half of the price of a corresponding Nikon lens, but according to some reviews still seem pretty valuable alternatives to the original Nikon ones. Personally, I can do fine without the Macro functionality, I rather would want to have a fast auto focus, therefore the HSM on the new updated 24-70mm is a plus. Although it might be slightly more expensive and my favorite so far, it is not yet available. The 70-200mm is kind of a no-brainer. So I guess I will  have to start saving for those lenses or should try to get rid of my old Nikon super zooms. Although my Nikon 18-200mm is a very handy and useful lens, I'm not too happy about the quality of the photos (regarding sharpness and resolution). I now made some shots in Egypt with low ISO values and the VR (vibration reduction) turned off, but I still need to evaluate those regarding improved quality compared to using the lens with VR turned on.

Here are some reviews of the mentioned Sigma lenses:
70-200mm: dpreview, FM Reviews
old 24-70mm with Macro: the-digital-picture, FM Reviews

For the new 24-70mm HSM I found no review yet, but a news post on dpreview and some discussions.

Saturday, January 10, 2009

Problems with Speed Download 4 and Safari when downloading RAR files

For a few weeks I now had the problem with Speed Download 4 and Safari when I wanted to download RAR files. I tried everything, uninstalling and reinstalling, disabling all other plugins (SafariStand, Glims, SafariAdBlock) but nothing helped, Safari always used its own download manager instead of handing the download to Speed Download 4.

Then I started to take a closer look at MIME types. Per default, the MIME type(s) setting for RAR archive in Speed Download 4 on my machine was application/x-rar-compressed, application/octet-stream. But I found a list with some more possible MIME types for RAR files. It finally worked again fine after completing the MIME type(s) setting for RAR archive in Speed Download to application/x-rar-compressed, application/octet-stream, application/rar, application/x-compressed, application/x-rar, compressed/rar. Now RAR file downloads are again intercepted by Speed Download 4.